
When it comes to doing a kitchen renovation many of us think that’s too hard or there’s no way I could do that. Well, we are here to prove that wrong!
Quarantine has taken us to the next level, so much that we have become DIYers. We started updating our kitchen: painting cabinets, new hardware, and painting walls. All this is something I never thought we would enjoy doing, but I guess when you are locked up for so long, you learn you can do more than you ever thought you could do.
When we did this, we literally had never done anything like this before (okay, we painted our cabinets in our condo, but not like we did this time). Because of this, I got a lot of repeat questions and I figured it would be easier to put all the answers in one place.
So here are the most asked questions we received when doing our kitchen renovation:
How long did this kitchen renovation take you?

With a house full of little kids, we wanted to have the least disruption and mess for our little family. We did lots of prep work before we actually removed everything out of our kitchen. I am fortunate that I get every other Friday off work. With that, I took Thursday off and we got everything mostly done over the weekend and were almost completely finished by the following weekend: removed everything from cabinets, cabinet prep, priming, painting, putting it all back together.
Our hardware took longer to arrive than expected, and we did not have tools to install the faucet so it took three weeks total. However, the main portion of the project was completed over a weekend.
What was the push that made you dive in?

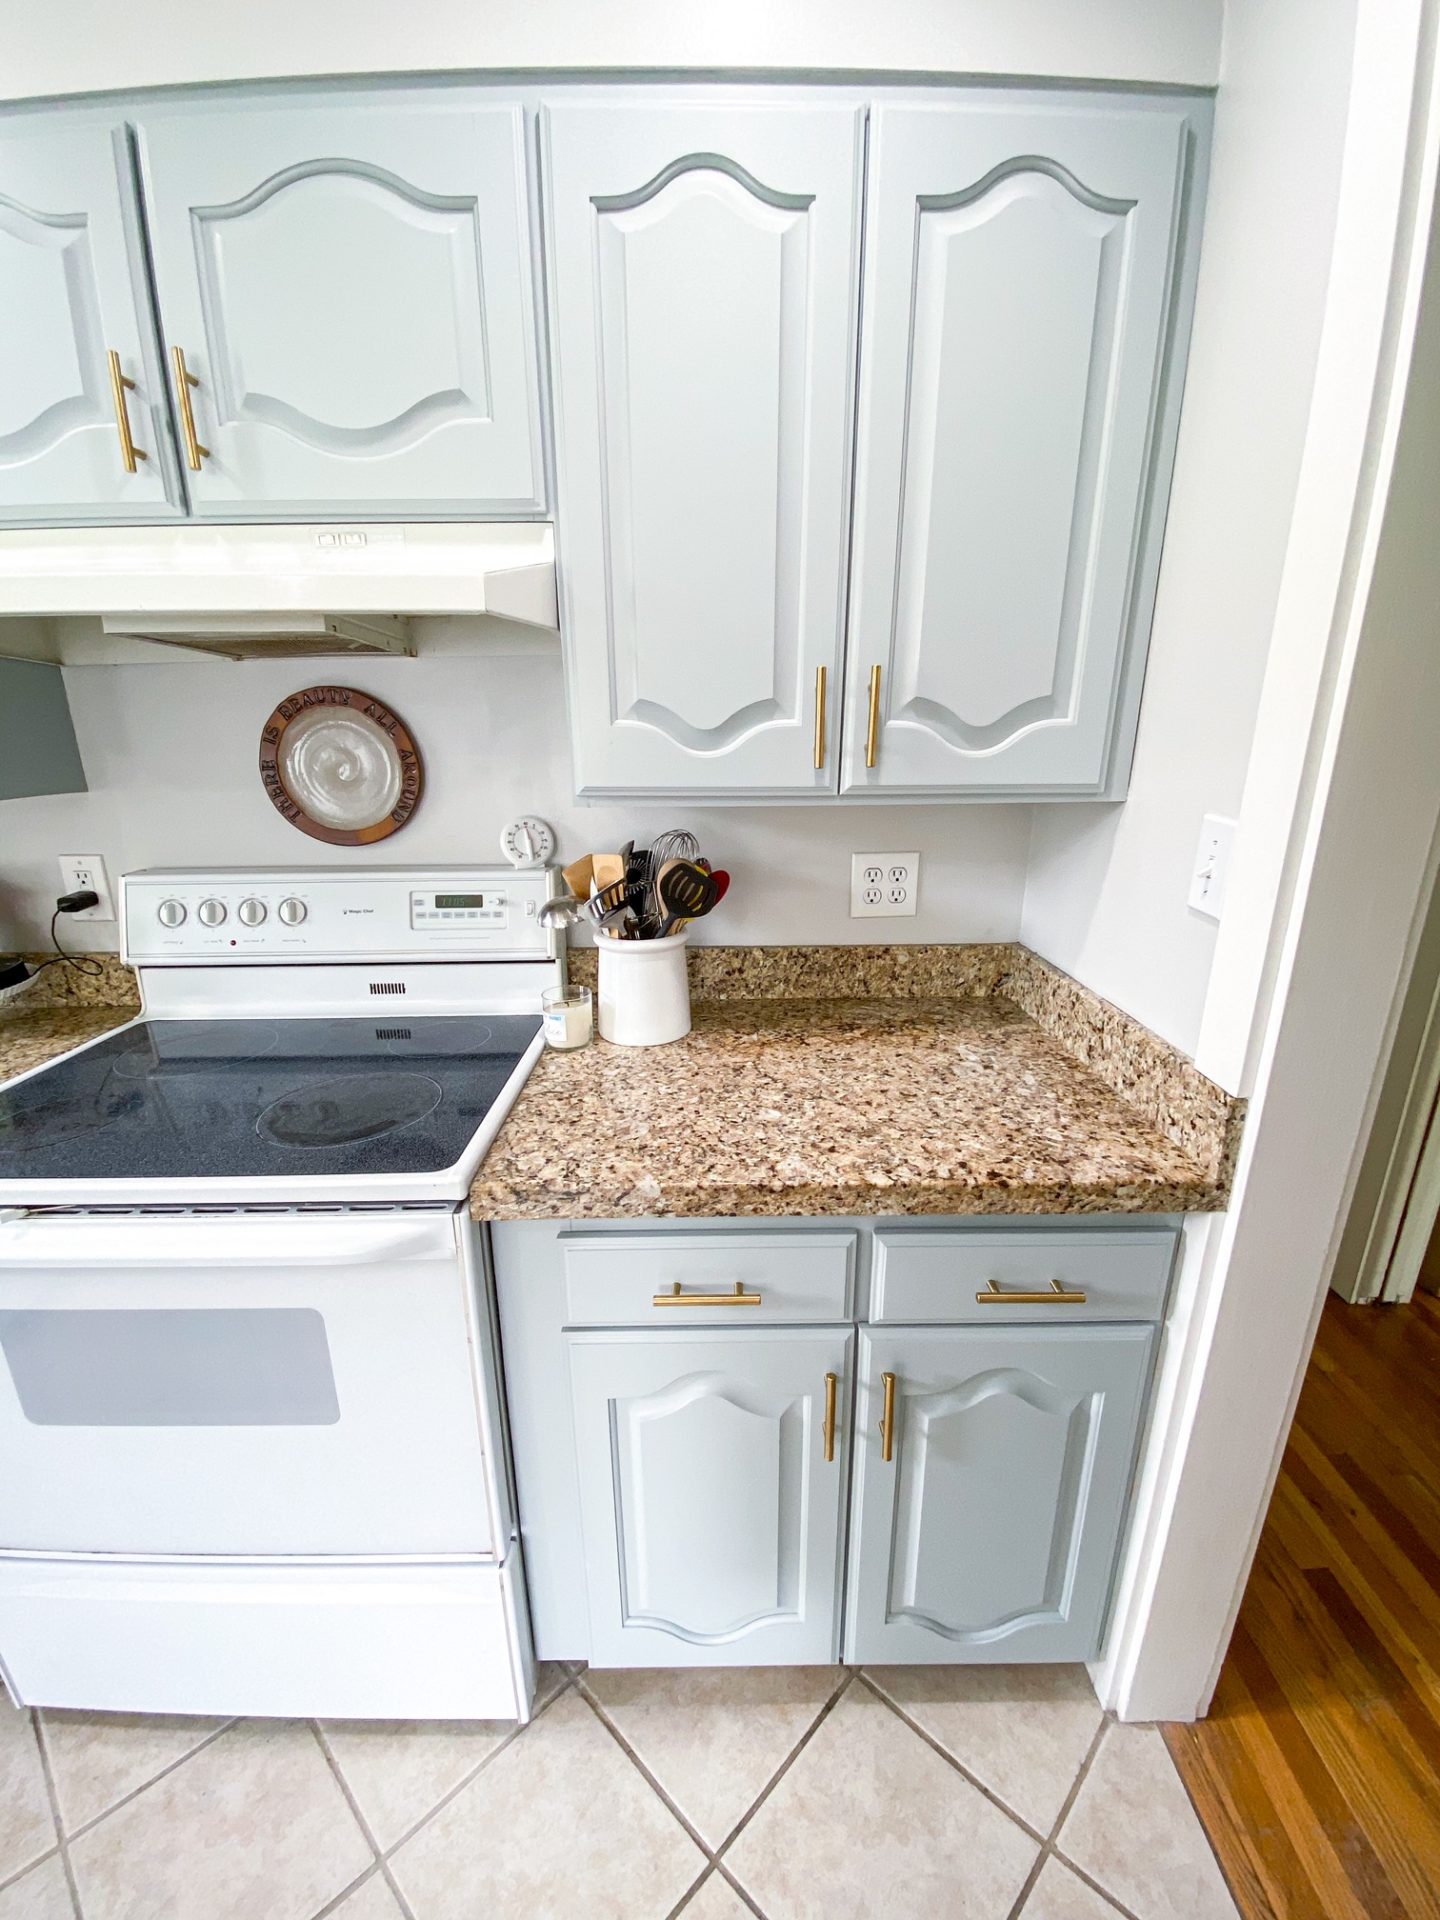
Emily and I both love cooking and I think being quarantined we realized how much we did not love our kitchen. We felt like a simple fix would be to upgrade it by painting cabinets and changing the hardware.
Honestly, I wish we had done this kitchen renovation sooner because it looks absolutely amazing! We love spending time in there now and keep it extra clean because it now feels like home. We also have been able to really organize and make it all flow so much better.
How much did you spend?

We didn’t have many tools and needed a couple things. I will break it all down:
- Sprayer: $70.00 on Amazon (get it here)
- Roll of paper: $10.00
- Brushes and tape: $20.00
- Paint (two gallons): $120.00
- Primer (two gallons): $80.00
- Cabinet pulls (we got the 30 pack): $51.74 on Amazon (get it here)
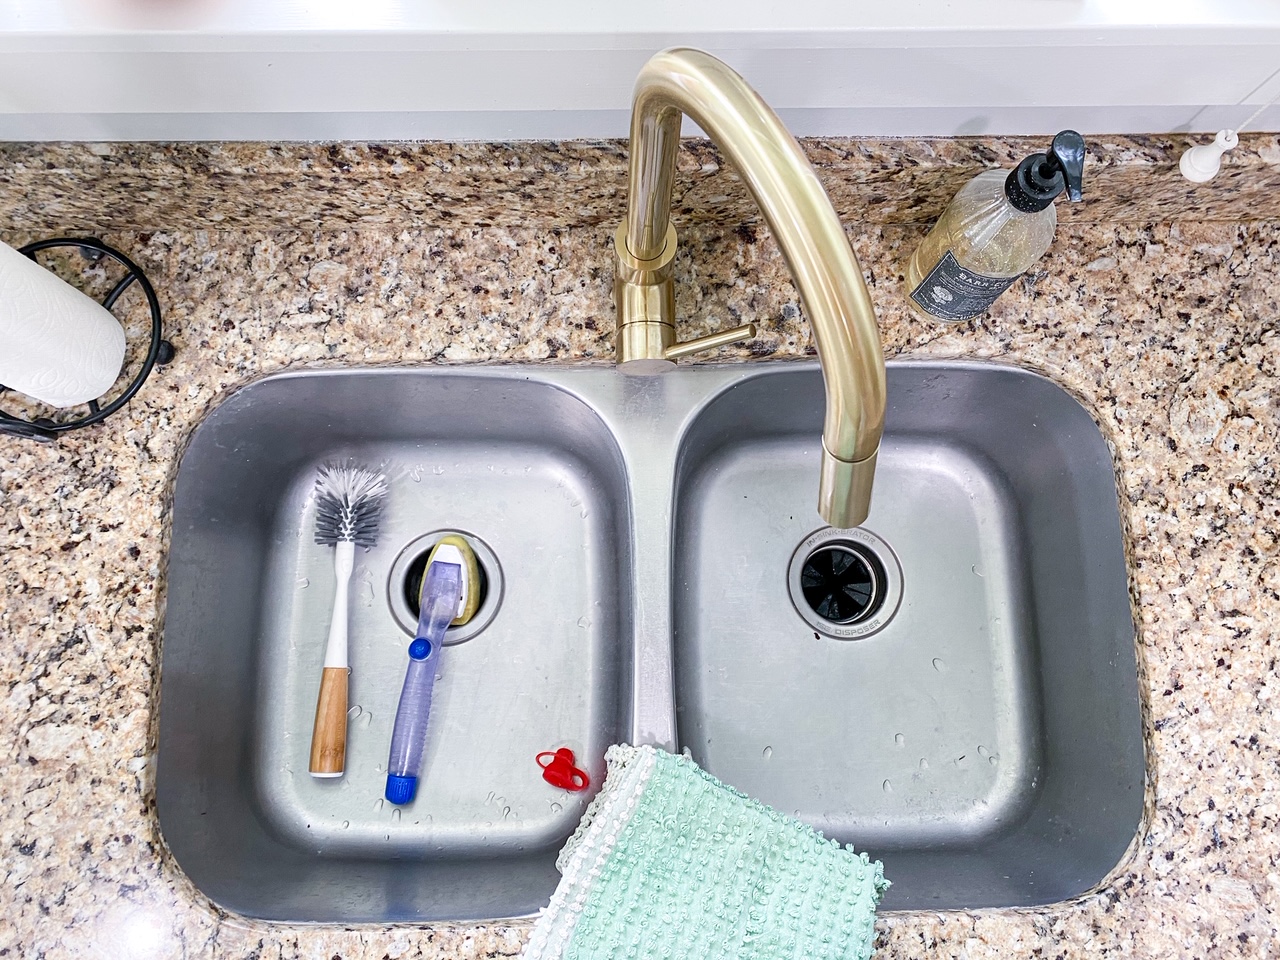
- Faucet: $166.90 on Amazon (get it here)
- Total: $518.64
What was the hardest part?

Not knowing what exactly we were doing. Not being able to get it all done in one weekend. Just having to wait is not my favorite thing. When I start something, I want to finish it and to leave things undone does not sit well with me.
It was also right during the quarantine, so for a project in general we would typically ask for help. That was not an option with this one. So we jumped in, reached out to a few expert friends (Vintage Revivals, Classy Clutter, and Chris Loves Julia), and went to work. We learned a lot, love having a sprayer, and feel like we got a whole new kitchen.
How did you handle doing the kitchen renovation with four kids?

Emily and I worked out a system. Early morning I would get up and spray a coat of primer or paint on the cabinet doors. Then, I would take the kids and Emily would work on the boxes. We would not do anything during the day but spend time with the kids and at night, after putting them to bed, we would do as much work as possible.
Paint sprayer

We had asked on Instagram what the best paint sprayer was and everyone basically recommended the same one. It was also recommended by Classy Clutter and Our Faux Farmhouse which are two huge DIYers that we love.
Plus, the price wasn’t crazy. We got it for $70.00 on Amazon. It took a while to finally come in the mail, but once we got it that’s when we started to get the paint going.

One thing I will say though, everyone said to watch the highlight on Our Faux Farmhouse’s Instagram (which I did multiple times), but never in there does it say the type of tips to use for which types of projects. Also, the entire sprayer comes assembled and when you are finished spraying you need to clean it ALL OUT. I didn’t know what I could and couldn’t take off. It is a long process to clean it all really well, but I will say it’s a task that is worth putting the time into each time. It made all the difference to clean it after each use.
The sprayer goes on smooth, but it is not like a spray paint can. You will most likely have to do a couple of coats. I did a few practice rounds with primer on cardboard and then sprayed the backs first. Then if I had any major errors, they wouldn’t be as visible.
We taped plastic around the perimeter of our garage and sprayed the doors in there. The over spray is crazy so make sure you cover anything you don’t want speckled. But most over spray can be scraped off or rubbed with denatured alcohol.

YouTube has lots of tutorials for using a paint sprayer. Most of the ones we found were professionals with crazy gadgets for holding cupboards, things we didn’t have. We places drop cloths on the floor of our garage and used red solo cups to hold them off the drop cloths. This was a game changer suggestion from one of my followers. It allowed the paint to adhere to the sides of the cupboards and not stick to the drop cloth. Another follower even told me about these amazing cabinet door risers that are genius (get them here).
Sprayer vs paint brush
This wasn’t our first time painting cabinets. When we were first married we had a condo and we painted our cabinets with paint brushes. It took a lot longer, didn’t look as good, and you could see the brush marks. With the sprayer, everything is much smoother, it’s a lot quicker, and looks like a professional did it. Any drips or blemished can be sanded out and resprayed.
How did you pick your color?

We were inspired by this picture from Cara Fox of The Fox Group’s home. We loved the classic look and feel and having been in the room where the picture was taken, it literally took our breath away. Her style is amazing and when we took polls on what colors to do she was the first to say the exact color, help with hardware and give us the confidence to do this kitchen renovation ourselves.

We kept trying to decide between all the same color or do the tops white to really open up the space, but really, when we saw this picture we knew we needed the whole room this color.
Paint: color, type, sanding, etc
This is probably the most asked question I get. So we first cleaned off all the cabinets and doors with TSP solution. After that we did a light sanding on everything just to rough it up and make the paint stick better.

We got our primer and paint from Benjamin Moore because we wanted a good quality cabinet paint and primer. Our boxes were original to the house and just had a wear and smell to them that we decided to paint both the insides and outsides of the boxes. I used the sprayer and Emily cut in and rolled the insides of the boxes and shelves. It is amazing to see the difference of the clean, polished insides. We primed and only had to paint one coat of color on the inside of the boxes.
The paint color we got from Cara of The Fox Group because we were inspired by the picture of this wall she did. We loved it and just asked. She was so gracious to give us the exact color.

Okay, the moment everybody has been asking for—the paint color! It’s Benjamin Moore Boothbay Gray half strength.
Sand by hand or sander
We sanded by hand because we did not need to do a lot of sanding. Our cabinets weren’t previously painted so we just had to get the varnish off. I would say though, if you have cabinets that are already painted you would need to sand more and a sander would be so much easier for that.
Painting the insides: worth it and is it needed?

I think it was worth it for sure. A lot of people said not to because it would just flake and not look good. When we got the paint at Benjamin Moore we got cabinet paint which dries a lot harder and made for taking a bit of a beating. I also thought they would look weird not being all the same color.
Our boxes were original to the house and just had a wear and smell to them that we decided to paint both the insides and outsides of the boxes. I used the sprayer and Emily cut in and rolled the insides of the boxes and shelves. It is amazing to see the difference of the clean, polished insides. We primed and only had to paint one coat of color on the inside of the boxes.
That is just our preference, and if you don’t want to paint the inside you don’t have to.
Why waiting so long between coats when paint dries in a couple hours?

Paint does dry in a couple hours, but the longer you wait between coats the more dry it is. Also, with the type of paint we used they told us to wait eight hours between coats and we were fine with it. It really worked out in our schedule.
I would spray the doors and the boxes at 8:00 am while Emily distracted the kids. Then we would switch and she would paint the insides of the boxes while I was with the kids. Then we had the entire day to work or play and once the kids were in bed we would repeat.
What’s Next?

We absolutely loved doing the kitchen renovation and have now realized we CAN do these things to make our house a home which we love to be inside. You can learn a lot on YouTube and just by asking people. There are a few projects we have that we want to do: backyard patio, painting the shed, remodeling the kids bathroom, and finishing our basement. Everything costs money though.


None of this project was sponsored. We did it all ourselves, on our dime, and once we save up for another project we will get it done. But if someone does want to sponsor us to do one of these projects, let me know. I promise an entertaining journey by your not so handy dad. One thing I’ve learned is that it’s really fun to have a project and work together with my wife to make it happen.
